In Construct, Timelines are sequences of changes over time. They can be used to make pre-defined movements and animations, such as cut-scenes. This tutorial will show you how to get started making your first timeline!
create a project
Create a new empty project and place a single sprite in it near the top-left of the layout.
If you want to use the same Sprite image as this guide, the image is below - either right-click and save it, or try dragging and dropping it straight in to Construct.
open timeline
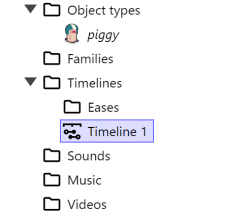
New projects include an empty timeline. Double-click the initial timeline in the Project Bar in the Timelines folder to open it.
 The initial empty timeline in the Project Bar.
You can optionally rename the timeline something else, like MyTimeline. You can do that by right-clicking the timeline in the Project Bar and selecting Rename.
Double-clicking the timeline opens the Timeline Bar showing that timeline. It might start as a free floating window over the layout. Since timelines display horizontally, it's often more convenient to dock it horizontally in the window. So if it's not already docked at the bottom of the window, drag it by its title bar and move the cursor over the blue square at the bottom of the screen, then release the mouse button. It'll show a blue area highlighting where the bar will go when the cursor is hovering over the blue square.
You should end up with the Timeline Bar docked at the bottom of the screen, like so:
add the sprite
Notice how the Timeline Bar says it is empty. You need to add an object to the timeline for it to be controlled over time.
The easiest way to do this is drag-and-drop the sprite in to the Timeline Bar. This adds the instance to the timeline with default tracks for controlling its position (via its X and Y co-ordinates). Alternatively you can click the + button on the toolbar to pick an object to add.
 The Timeline Bar with the sprite added.
Before we continue, there are a few important aspects of the Timeline Bar that we need to define.
Timeline tracks
Notice the various horizontal rows in the timeline. The row with the object name is called a track. In this row are master keyframes, which appear as black circles.
Below the object name are rows for the X and Y co-ordinates. These are called property tracks, and affect properties of the object over time. In this row are property keyframes, which set a new value at a particular time, and appear as blue squares.
Timelines are commonly used for moving objects over time, hence the default property tracks to modify the X and Y co-ordinates. However it's possible to add other property tracks controlling other kinds of properties, including the angle, Z elevation, color, instance variables, behavior properties, and more. You can also add more objects to the timeline to control multiple objects at once from a single timeline. To keep this tutorial simple we'll just stick to one object with some basic property tracks.
Timeline markers
Notice the green line at the 5 second mark on the timeline. This marker indicates the end of the timeline. You can click on it and drag it to change the length of the timeline. It also corresponds to the Total time property of the timeline, which you'll see in the Properties Bar if you click the timeline name in the Timeline Bar or the Project Bar.
There is also a red line indicating the current time in the timeline. This is used for editing the timeline and indicating playback. It starts at the 1 second mark. Clicking on the timeline ruler will position it. Also similarly to the green total time marker, you can click and drag it to move it, and see it in the Properties Bar as the Time property.
Next we'll start adding keyframes to the timeline to create an animation.