It's time to start editing the timeline!
enter edit mode
Normally the position of objects in the layout is the initial position when the layout starts. Moving an object somewhere else will mean it's initially placed at a different position.
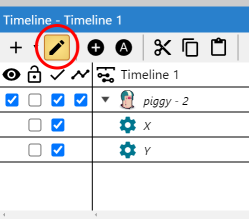
Timelines work differently, since the position and properties of objects can vary over time. To handle editing the timeline instead of the initial layout, we need to enter editing mode in the Timeline Bar. To do this, click the editing mode toolbar button in the Timeline Bar to turn on editing mode. The toolbar icon looks like a pencil, and becomes highlighted when it's enabled.
 The editing mode button in the Timeline Bar.
Notice in editing mode the Layout View displays slightly differently: points appear indicating position keyframes on the timeline, and when the sprite is selected it highlights yellow instead of blue to indicate it's modifying a timeline rather than the layout.
add a keyframe
At the moment the object doesn't move at all during the timeline. Let's add a new keyframe so it has somewhere to move to. Each time we want to add a keyframe, there are three steps to follow:
- Set the current time in the Timeline Bar
- Set the properties we want at that time
- Add the keyframe
For this tutorial let's make the sprite move over to the right hand side of the viewport over 1 second. So to do this:
- Click the 1s mark on the timeline ruler, to set the current time (red line) to the 1 second mark.
- Click and drag the sprite in the Layout View to the other side of the viewport. (Keep it within the dashed rectangle so it stays on-screen.) Notice the sprite is highlighted yellow in editing mode, and a line shows its movement path.
- Click the Set keyframes button in the Timeline Bar.
 The 'Set keyframes' button in the Timeline Bar.
You should now be able to see a movement line, and extra keyframes in the timeline at the 1 second mark.
Preview the timeline
Let's play the timeline so far! The Timeline Bar has playback controls in its toolbar. First click the First master keyframe button which will rewind the time to the start. Then click the Play button. You should see the object move across the screen!
 Playback controls in the Timeline Bar.
Notice that during playback the object moves in the Layout View, and the red current time marker moves along in the Timeline Bar reflecting the current playback.
Scrubbing
Clicking on the timeline ruler to set the current time (red line) will also update what's showing in the Layout View to show you how things look at that time - a process also known as scrubbing. If you want to move the time without previewing, hold Control while dragging on the timeline ruler.
add more keyframes
Try adding some more keyframes, moving the object anywhere you like in the layout up to the end time marker at 5 seconds. Remember you must follow all three steps each time you add a keyframe: set the current time, move the object, and then set the keyframes. If you forget one of those steps, you might accidentally overwrite previous keyframes, or set two keyframes in the same place.
Also notice that once you have a few keyframes down, you can drag and drop the position keyframe points in the Layout View to conveniently edit them.
Eases
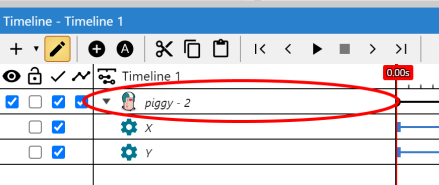
Click the timeline track in the Timeline Bar - that's the one with the object name.
 The timeline track with the object name.
Then in the Properties Bar, try changing the Ease property and previewing the timeline again. You'll see each ease mode changes how the object gets from A to B. The default is Linear, which just goes at a fixed speed. Other ease modes have more interesting styles of movement, such as In Out Elastic, which looks a bit like the object is being pulled by an elastic band, or Out Bounce, which looks like it's falling down and bouncing at the end.