Displaying the score
To display the player's score, we'll use a Text object. However we want to display it on a fixed position on-screen. The view follows the player, and we don't want the score to disappear as the player walks away! To fix this, we'll need to add a new layer.
Adding a layer
Layouts can consist of multiple layers, which you can use to group objects. Imagine layers like sheets of glass stacked on top of each other, with objects painted on each sheet. It allows you to easily arrange which objects appear on top of others, and layers can be hidden, locked, have parallax effects applied, and more. We want our score to display on top of everything else, and also to stay in the same place on screen, so we can add a new layer to do this.
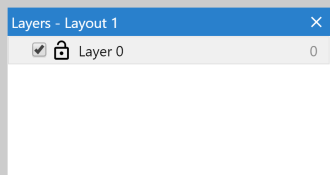
Turn your attention to the Layers bar. By default this is in the lower-right corner of the screen.
 The Layers Bar
You should see Layer 0 in the list.
Right-click in the Layers Bar and select Add layer at top. (Be sure to add it at the top, not the bottom, because we want the score to display on top of everything else!) When you add it, you can immediately type in a name. Enter HUD, which stands for Heads-Up Display - which is a term used for all the on-screen information.
Now, make sure the 'HUD' layer is selected in the Layers Bar. This is important - the selected layer is the active layer. All newly added objects are added to the active layer, so if it's not selected, we'll later accidentally add our Text object to the wrong layer. The active layer is shown in the status bar in the bottom-right corner of the Layout View - it's worth keeping an eye on.
Parallax
The HUD should always stay in the same place on the screen. By default, layers scroll as the view moves. To keep them on the screen, we can use the layer Parallax setting. Parallax allows different layers to scroll at different rates for a sort of semi-3D effect. If we set the parallax to zero, though, the layer won't scroll at all - ideal for a HUD.
Since you have the HUD layer selected, its properties should be showing in the Properties Bar. Set the Parallax property to 0 x 0 (that's zero on both the X and Y axes).
Now we have a layer where we can place objects that appear in a fixed place on-screen! However, we don't have any objects on it yet.
Adding the Text object
Switch back to the Layout View using the tabs at the top. Make sure the HUD layer is selected in the Layers Bar, to ensure the Text object is added to the right layer. Double-click a space to add another object. This time pick the Text object.
Place the Text object in the top left corner of the layout. It's going to be hard to see if it's black, so in the Properties Bar, make it bold, italic, yellow, and choose a slightly larger font size. Resize it wide enough to fit a reasonable amount of text. It should look something like this:
Switch back to the event sheet. Let's keep the text updated with the player's score. In the Every tick event we added earlier, add the action Text►Set text.
Using the & operator, we can convert a number to text and join it to another text string. So for the text, enter:
"Score: " & Score
The first part ("Score: ") means the text will always begin with the phrase Score:. Pre-defined text has to appear in double-quotes in expressions. The second part (Score) is the actual value of the Score global variable. The & joins them together in to one piece of text.
Run the game, and cast some spells at some goblins. Your score is displayed, and it stays at the same place on the screen!